
Invitations
For the invitations, I bought linen cardstock from Paperandmore.com.
I cut the 8.5 x 11 sheets into 5x7 sheets (so, 2/8.5x11).
I had designed the invitation in Adobe InDesign and then printed out the layout.
 The invitation with its wrap on and without.
 The invitation close up.
Since I only have an inkjet printer, I had to photocopy the invitation on a laser printer in order to get a copy with carbon. The
Gocco needs to have a carbon print so that it can burn the images from the original printout onto the screens when the bulb flashes.
The flash essentially burns holes in the screen where there was carbon on the original piece and then after the screen is inked, and then closed onto the intended paper (my invitation paper), the ink smushes through the holes in the screen onto the paper.
A sweet tutorial that I depended on is
here.
We printed the main text black and then our names in red. To do this, we just used the ink blocker (foam like) to contain the red ink and black ink- this way we could print each invitation in just one pass.
After printing the ink onto the invitations, John poured embossing powder on the wet ink and then we took turns using the heat embossing tool to melt the embossing powder. Once it melted, it became shiny and raised. Because we did this, we were able to get raised text on the invitations without paying for embossing or letterpress.
Miss. Fondue on Weddingbee did an
awesome tutorial with really good pictures to show the embossing step. Instead of using a stamp and inkpad, we just used the Gocco for that step. The Gocco ink takes awhile to dry, so it was easy to get the embossing powder on there in time.
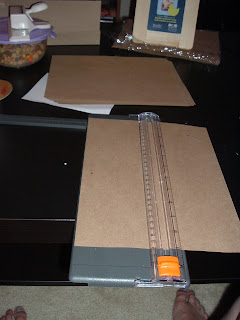
Wraps:To create the wraps, I just cut an 8.5x11 piece of
recycled kraft cardstock in half lengthwise. It was really important to me to use recycled/rapidly renewable resources whenever possible since we are using so much paper.
Next, I used a Martha Stewart lace hole puncher to make the edges lacy and make the wrap overall look less heavy.

The finished stack of wraps:

The end result of all of that hole punching:

My palm was bruised for a few days :(
After I had the wraps done, I used a manila folder cut down to 5x7 as a template to fold all of the wraps, for easier assembly (I made the wraps before the invitations).
The Insert Booklets:For the insert booklets, I created the layout in Adobe InDesign. I wanted the pages to be printed two-sided and like a booklet, so I had to take a little time to figure out what page needed to be printed where.
 The front page and back page of the booklet.
 The center two pages of the insert booklet- the map and directions.
To create the map, I used
google maps and then just traced over the lines that I wanted in Adobe Illustrator. I found some icons online and used them as markers on the map for the hotels, the reception and the church.

After John printed the insides of the booklet out on
linen paper that matched the invitation cardstock, I cut the paper down the center and then folded it in half. The booklets were designed to be 8.5x11 paper cut in half lengthwise.
A piece of 8.5x11 kraft cardstock was printed with the word "celebrate and then cut in half lenghtwise as well. This was folded on the outside to create the cover to the booket. To bind the booklet, I used red embroidery thread (think friendship bracelets) and just tied a knot.
RSVP:The RSVP postcards were also designed in Adobe InDesign. First I created a flower pattern that I liked and found the right color combination and then layered the flowers and colors.

The postcards were also printed 2-sided, and on the same linen cardstock as the invitations.

The postcards were designed to be 4/8.5x11 piece of paper with no extra paper- no waste & easy cutting for me!
We left a blank space at the top of the postcard, instead of the M__________. We wrote in each guest's name so there would be no confusion as to who is invited (especially since we don't have an inner enveope).
Assembly:
I enclosed the invitation in the wrap and tied it with some more red embroidery thread, just tied in a simple knot.
I laid the postcard directly on top of the invitation horizontally, with the front out. On top of the RSVP, I placed the insert booklet. Since the booklet was the exact same size as the RSVP, the postcard was hidden.
These were all placed in an
envelope that was the same linen as the invitation cardstock and paper.


 Jaq wanted to help. He was definitely a fan of the raffia.


 Click on the picture to enlarge it- you can really see
 Click on the picture to enlarge it- you can really see


