Showing posts with label Wedding- DIY. Show all posts

Rebecca & Eric: Wedding

My sister got married in June at my parents' house in Virginia on the lake. It was very much a DIY wedding. 

For the last year since my parents bought the house, they and my sister (who lives there full time while my parents are in NY) have been fixing it up and preparing for the wedding. The house itself was in kind of rough shape when they bought it, so there was a lot of cleaning, painting, etc. to do. My dad went down last Thanksgiving to New Year and actually tore out the old (very non-functioning) kitchen and put in a new one. 

My sister and Eric also prepared the landscaping and other random things around.


Even the flowers planted were pink this year.. You will quickly realize what the wedding color scheme was..

After/during the first kiss, one of the neighbors whose boat house is in the background shot off a cannon that he has! Other neighbors across the lake set off fireworks at supper time.

We got down to VA on Friday around lunch time and were quickly put to work (with a bunch of other family and family friends that got there early) ironing tablecloths, putting out place settings and other random chores.

On the boat house before the rehearsal dinner. Also- there are 3 of us in this picture and we didn't know it for 2 more days.

Saturday morning was a flurry. First thing we (my mom, sister and I) started making the table centerpieces and then shortly moved on to the corsages and boutonnieres.


My dad and John were sent out to get balloons for the driveway.


I didn't even get to work setting up the cake until the flowers were all cleared from the kitchen island and then as soon as I finished with the cake I got dressed and then ran around doing last minute things... like putting flowers on the tables, etc.


Eventually it was wedding time, the caterers showed up and basically took over the other prep/setting up. They were awesome.

No one could figure out the bustle. Also? Fancy bouquet I made there, eh?


And he had had absolutely nothing to drink besides sprite.


Read more...

To-Do So Far..

-Gocco Amanda's custom notecards

*attempted, but it didn't work out- I bought these from Etsy seller sketchesbydms. They will be personalized with Amanda's future name (she's getting married in June!)


-print Programs sign and attach to basket w/ribbon
*done and done


-wrap the groomsmen ties and bobbleheads (oh yeah- we went there- custom bobbleheads)
*The ties are wrapped, but the styrofoam that the bobbleheads were being stored in rubbed off onto their heads and when John tried to clean them off, the foam pealed off the paint! I am going to have to re-paint them on Tuesday night and then wrap them.

-figure out what is going to NY next week
*There is a giant pile by the door. I also want to go Christmas shopping today and wrap presents for my parents so that will be done.

-make dill dip, bread bowl & veggie sticks to bring to football on Saturday
*Done. I forgot to take a picture :(

-try and get the work computer dude to set up my computer so I can work from home during the inauguration
*Waiting (and waiting still) for him to call. He was supposed to call at 12:30 today- its now 3:30 and I have yet to hear from him. I emailed him and haven't heard back yet.

-set up cookie decorating party w/the girls (and maybe the boy cousins) of John's family
*I just wrote to John's mom to see how she thought it would go over.

-make plans with John's SIL to go to a Rachael Ray book signing
*I haven't heard from Liz yet- she should be writing soon I think..

-stain or paint the letters for the church doors
*I think John may stain them while I go Christmas shopping at Target this afternoon..

What else did I do yesterday?
-Print business cards for guests to go in the favors with information on how to upload digital pictures from the wedding.

Front

Back

-Made the stickers that will go on the inside flap of the favor boxes:

The last two projects that I did yesterday were for free! The business cards were made with a pack of perforated cards that I had bought and used when I was applying for jobs. Other than computer ink, thats all that went into that project. The stickers were printed on what remained from the 8.5x11 label paper that I used to make the wraparound labels for the save the dates. Again, the only other material used was printer ink.

The rest of today will include:
-Christmas shopping
-Finish putting back together the living room. It is currently apart so that we can start shuffling things for when I move in.
-Show our friend Marie around because she will be watching/checking in on Jaq while we go to NY for Thanksgiving and the wedding. (Side note- Marie is newly pregnant & Friday went to the ER worried she might be having a miscarriage. The Dr told her that she's not miscarrying- she's having TWINS! Holy cow!)
-Stain the letters for church and add a ribbon loop for hanging purposes.
-Have PIZZA for supper!
-Pack up and head back to my apartment. Ugh.

Read more...

EAD - DIY Month!

Today my invitations were one of the entries on Elizabeth Anne Design's blog for DIY month!

I submitted a few other projects, so keep an eye out for them!

Read more...

Savin' the dates for someone else..

Tonight I created some save the dates for my cousin. She is getting married on the 4th of July!

Her plan is to upload a design to VistaPrint and then have them print some postcards for her. The more detailed information will most likely be included on the back (I may end up Gocco'ing that).

Crystal is living in Florida, so she and Kelly are going for a bit of a beach theme. She will attach a magnet to the back of the postcard and then possibly tie a piece of raffia around the postcard/magnet and insert it in a cute envelope.

Here are a few versions of the postcard front that I created for her.


And my favorite:

Their names are separated by a starfish which also shows up in their monogram.


Since their entire monogram could not be incorporated on the front of the postcard, this is how I related back to that.

All of this may still be tweaked, so I will make sure to post pictures when I get the save the date in the mail!

Read more...

Table Cards


For the table cards, I wanted to make the names/table number part as easy as possible, since it would come down to right before the wedding before I'd be able to complete these, due to RSVPs.

What I decided to do, was print the names and table numbers on mailing labels and then fold the edges around the actual table card so that it doesn't really look like a label.

To make the tent/folded card, I cut kraft cardstock into 2.25"x5" strips. The width is based on the width of the labels and the height is twice what I thought was a good proportion in relation to the width (2.5"), since they will be folded in half.

After they were cut, John used the Martha Stewart lace puncher (that we used on the invitation wraps), to lace the bottoms of the cards.


The next layer is made up of a cool red and white wrapping paper that I found on the clearance aisle of Michael's. I used this wrapping paper on the table numbers too.

I cut the wrapping paper into strips:


andd then glued them on the center of the table cards and folded the edges over:


The last step won't come until the end of December/beginning of January. We will print out each guest's name onto the labels, in addition to which table they will be seated at. We will somehow incorporate a signal as to which meal they have chosen (table number color, a gem, etc.)

Read more...

The Invitations - DIY!


Invitations
For the invitations, I bought linen cardstock from Paperandmore.com.
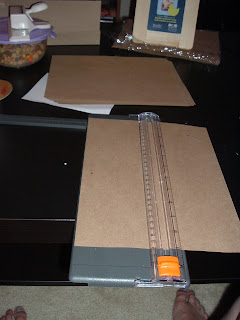
I cut the 8.5 x 11 sheets into 5x7 sheets (so, 2/8.5x11).

I had designed the invitation in Adobe InDesign and then printed out the layout.

The invitation with its wrap on and without.


The invitation close up.


Since I only have an inkjet printer, I had to photocopy the invitation on a laser printer in order to get a copy with carbon. The Gocco needs to have a carbon print so that it can burn the images from the original printout onto the screens when the bulb flashes.

The flash essentially burns holes in the screen where there was carbon on the original piece and then after the screen is inked, and then closed onto the intended paper (my invitation paper), the ink smushes through the holes in the screen onto the paper.

A sweet tutorial that I depended on is here.

We printed the main text black and then our names in red. To do this, we just used the ink blocker (foam like) to contain the red ink and black ink- this way we could print each invitation in just one pass.

After printing the ink onto the invitations, John poured embossing powder on the wet ink and then we took turns using the heat embossing tool to melt the embossing powder. Once it melted, it became shiny and raised. Because we did this, we were able to get raised text on the invitations without paying for embossing or letterpress.

Miss. Fondue on Weddingbee did an awesome tutorial with really good pictures to show the embossing step. Instead of using a stamp and inkpad, we just used the Gocco for that step. The Gocco ink takes awhile to dry, so it was easy to get the embossing powder on there in time.


Wraps:
To create the wraps, I just cut an 8.5x11 piece of recycled kraft cardstock in half lengthwise. It was really important to me to use recycled/rapidly renewable resources whenever possible since we are using so much paper.


Next, I used a Martha Stewart lace hole puncher to make the edges lacy and make the wrap overall look less heavy.


The finished stack of wraps:


The end result of all of that hole punching:


My palm was bruised for a few days :(

After I had the wraps done, I used a manila folder cut down to 5x7 as a template to fold all of the wraps, for easier assembly (I made the wraps before the invitations).


The Insert Booklets:

For the insert booklets, I created the layout in Adobe InDesign. I wanted the pages to be printed two-sided and like a booklet, so I had to take a little time to figure out what page needed to be printed where.


The front page and back page of the booklet.

The center two pages of the insert booklet- the map and directions.

To create the map, I used google maps and then just traced over the lines that I wanted in Adobe Illustrator. I found some icons online and used them as markers on the map for the hotels, the reception and the church.


After John printed the insides of the booklet out on linen paper that matched the invitation cardstock, I cut the paper down the center and then folded it in half. The booklets were designed to be 8.5x11 paper cut in half lengthwise.

A piece of 8.5x11 kraft cardstock was printed with the word "celebrate and then cut in half lenghtwise as well. This was folded on the outside to create the cover to the booket. To bind the booklet, I used red embroidery thread (think friendship bracelets) and just tied a knot.

RSVP:
The RSVP postcards were also designed in Adobe InDesign. First I created a flower pattern that I liked and found the right color combination and then layered the flowers and colors.


The postcards were also printed 2-sided, and on the same linen cardstock as the invitations.


The postcards were designed to be 4/8.5x11 piece of paper with no extra paper- no waste & easy cutting for me!

We left a blank space at the top of the postcard, instead of the M__________. We wrote in each guest's name so there would be no confusion as to who is invited (especially since we don't have an inner enveope).


Assembly:
I enclosed the invitation in the wrap and tied it with some more red embroidery thread, just tied in a simple knot.

I laid the postcard directly on top of the invitation horizontally, with the front out. On top of the RSVP, I placed the insert booklet. Since the booklet was the exact same size as the RSVP, the postcard was hidden.

These were all placed in an envelope that was the same linen as the invitation cardstock and paper.


Read more...

Numbering the Tables!


A couple of weeks ago, I went to Michael's with my 20% off total purchase coupon in hand. On the list- 20 wooden picture frames, unfinished- for $1 each. I came up with these:

Minus the Jaq of course.


Using a little elbow grease and a bunch of wood stain, I transformed the unfinished frames into these:

The center is a piece of 4x6 kraft cardstock with a red and white patterend wrapping paper on one side. I found the wrapping paper on the Michael's clearance aisle! I picked up a couple of rolls!

I bought white cardstock numbers from a lady on ebay that I will glue in the center of each picture frame, similar to these:


Oh yeah- I'm splitting the frames with my cousin who is getting married in July.

The Math:

20 framesx $1 each = $20
-20% off of entire purchase = $16
/2 to share with my cousin = $8 for 20 frames (or $.40 each!)

Read more...

  © Blogger template Shush by Ourblogtemplates.com 2009

Back to TOP